Product, Order & Contact Navigation
Reference master data in Navision Zwerfkei — products, orders and contacts — lives in specific lists. This page documents how to navigate to each one. See README for the broader ERP integration documentation.
Prerequisite
You need an active Navision Zwerfkei session to follow these steps. See Local Werkplek (RDP) and Login Procedure if you haven't connected yet.
Finding products — Retail-artikelen
Product (article) master data lives in the Retail-artikelen (Retail Articles) list.
1. Navigate to Retail-artikelen
In Navision, drill down through the Afdelingen (Departments) navigation tree on the left, following this path:
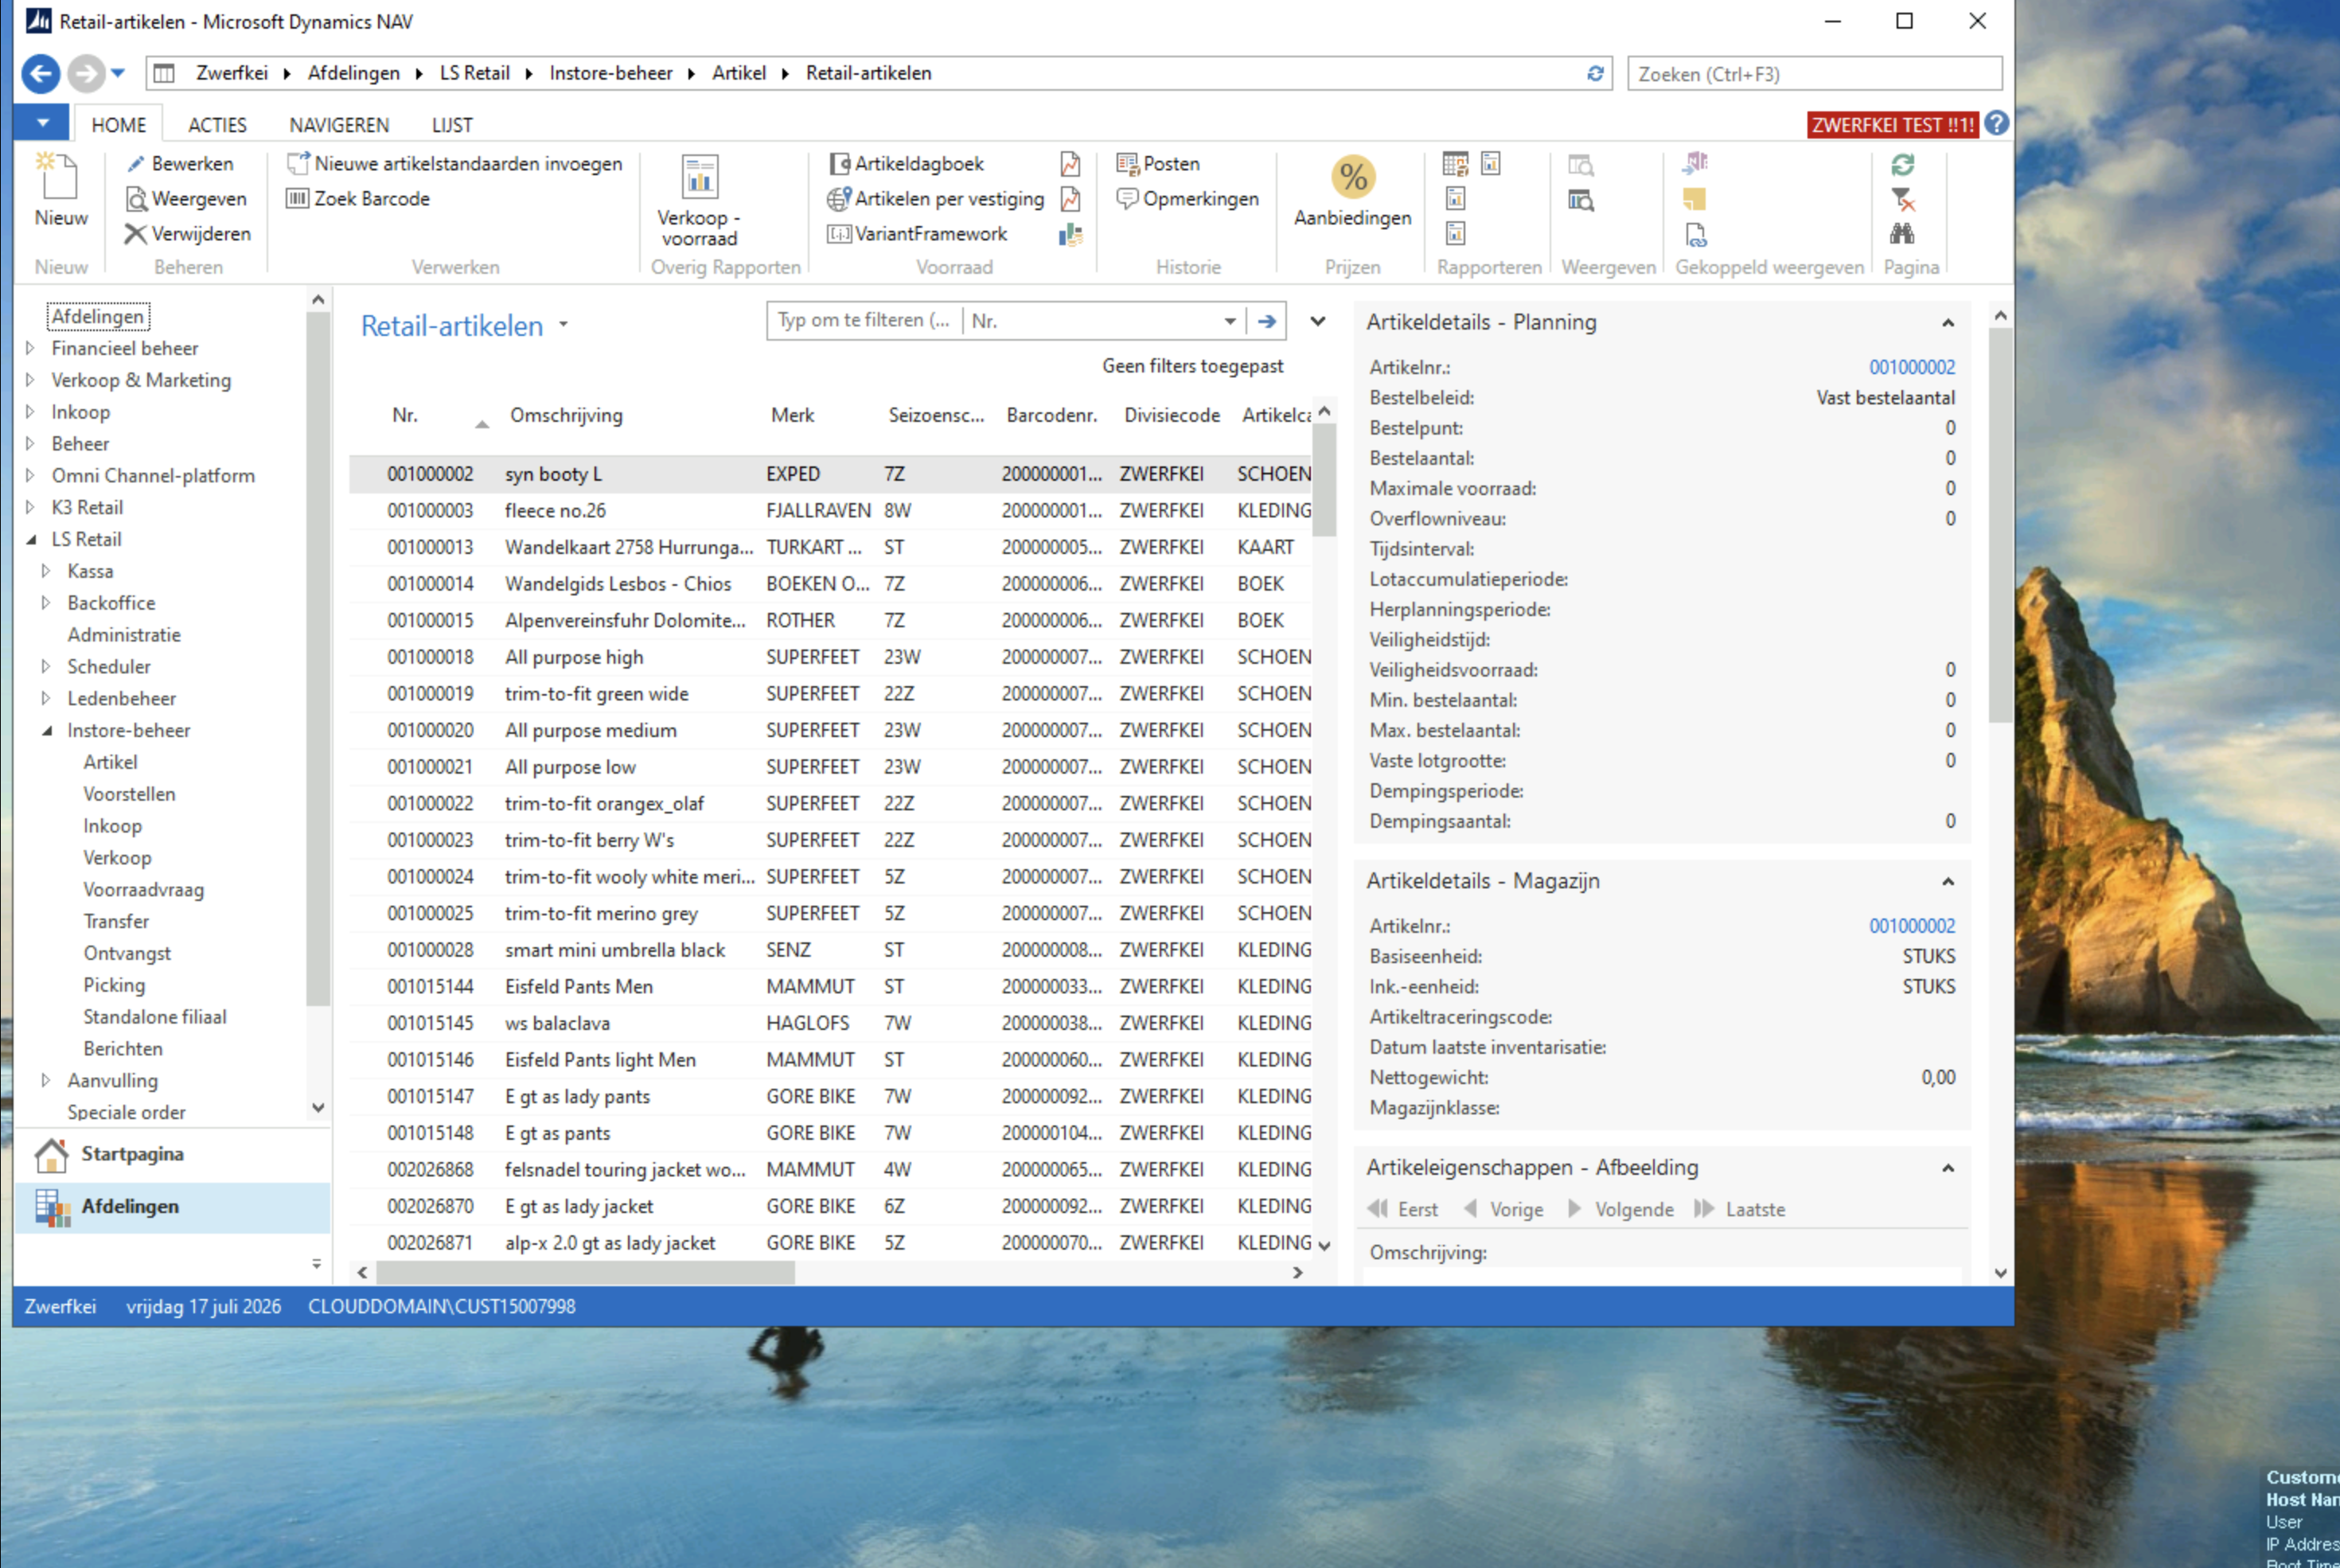
Zwerfkei › Afdelingen › LS Retail › Instore-beheer › Artikel › Retail-artikelen
This same path is also shown as a breadcrumb in the address bar at the top of the window once you're on the page, so you can navigate directly there if you know it.
2. Reading the list
The Retail-artikelen list shows one row per article, with the most relevant columns:
| Column | Description |
|---|---|
| Nr. | Article number |
| Omschrijving | Description / product name |
| Merk | Brand |
| Seizoenscode | Season code |
| Barcodenr. | Barcode number |
| Divisiecode | Division code |
| Artikelcategorie | Article category |
Selecting a row populates the panels on the right — Artikeldetails - Planning, Artikeldetails - Magazijn (warehouse), and Artikeleigenschappen - Afbeelding (image) — giving a quick view of planning, stock and image data without opening the full article card.
Opening the full article card
Double-click a row, or select it and use Bewerken (Edit) in the ribbon, to open the complete article card with all fields and related entities.
Finding orders — Transactiejournaal
Order / transaction data lives in the Transactiejournaal (Transaction Journal) list.
1. Navigate to Transactiejournaal
In Navision, drill down through the Afdelingen navigation tree on the left, following this path:
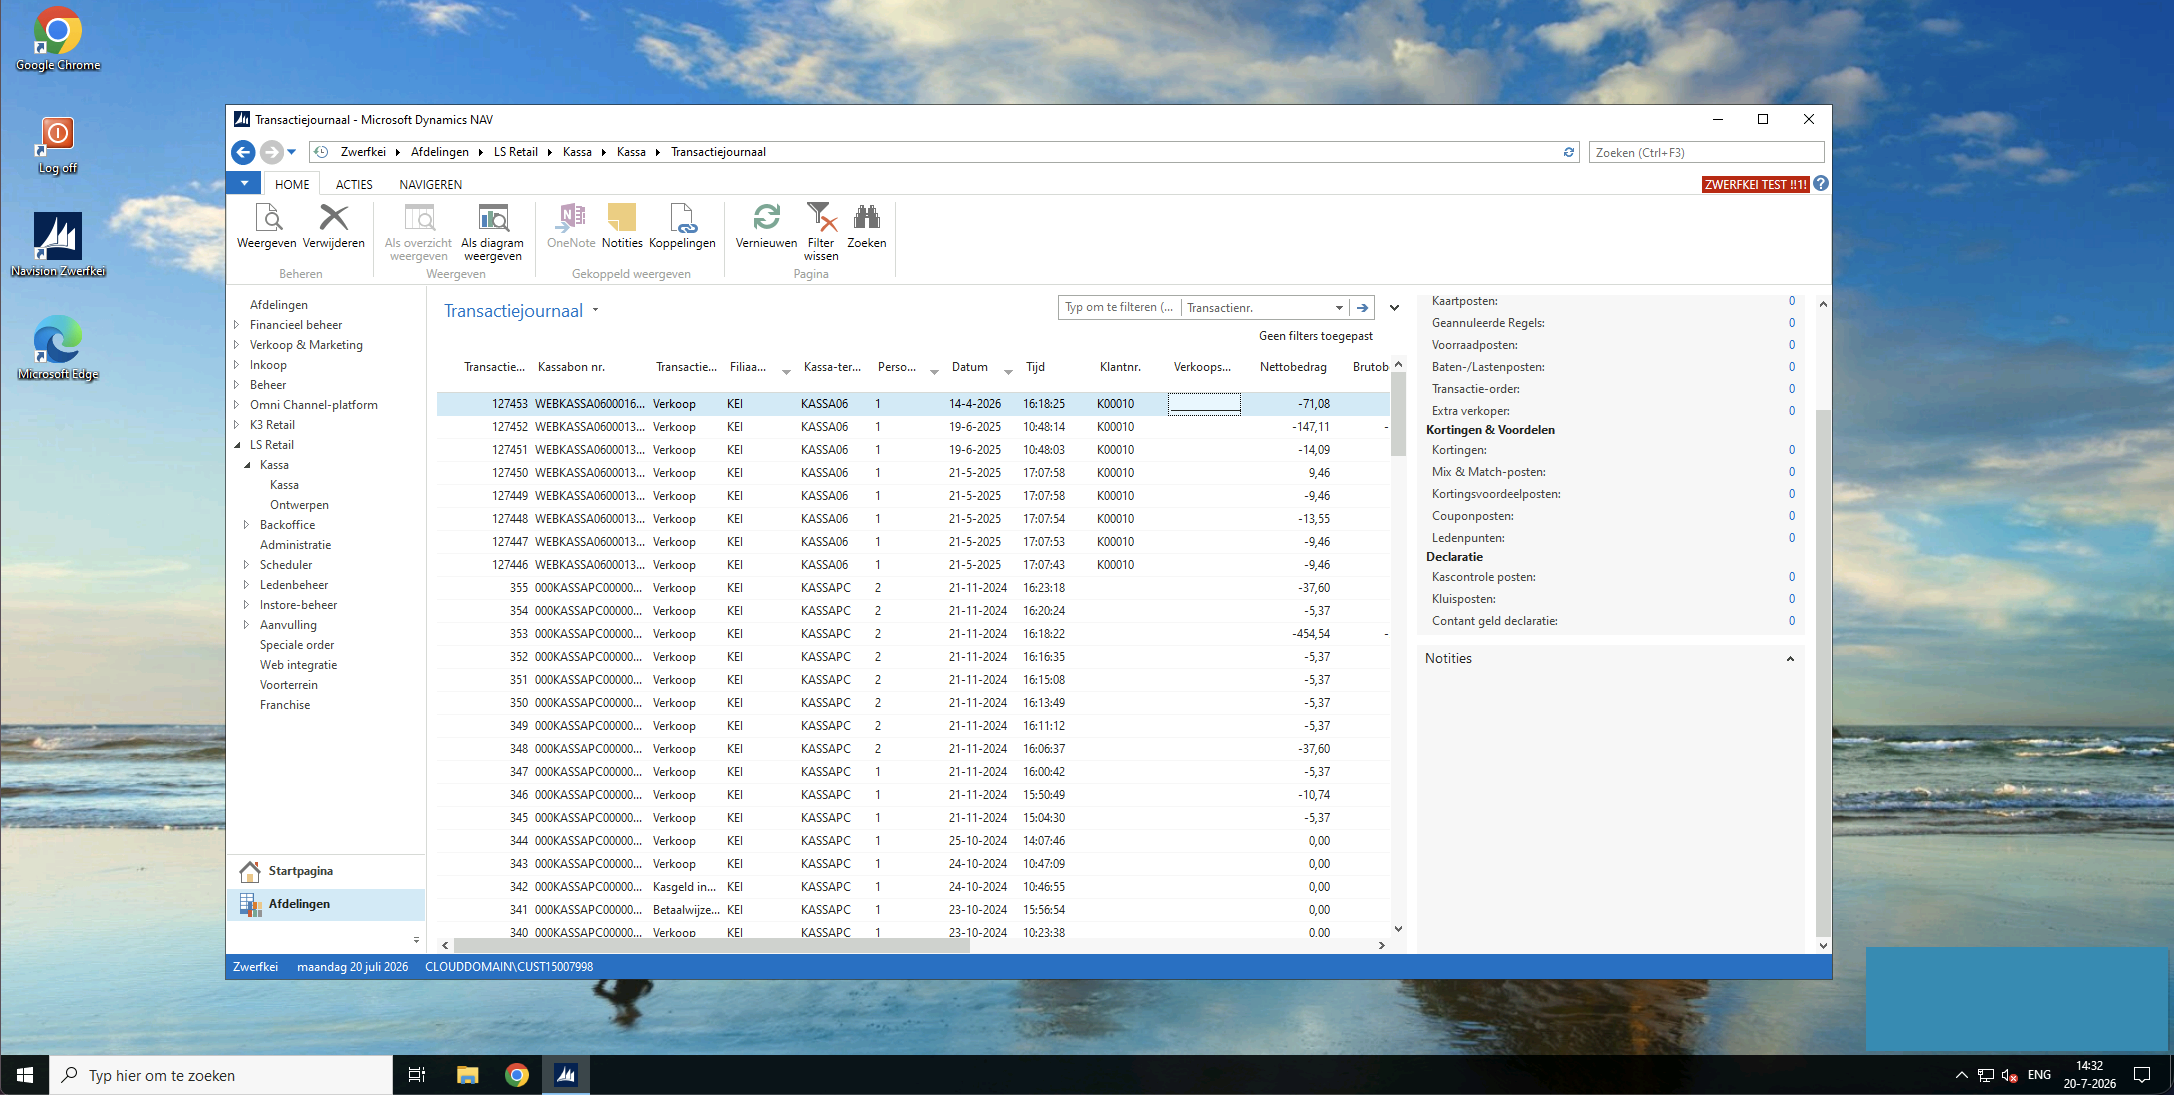
Zwerfkei › Afdelingen › LS Retail › Kassa › Kassa › Transactiejournaal
As with Retail-artikelen, this path is also shown as a breadcrumb in the address bar once you're on the page.
2. Reading the list
The Transactiejournaal list shows one row per POS transaction, with the most relevant columns:
| Column | Description |
|---|---|
| Transactienr. | Transaction number |
| Kassabon nr. | Receipt number |
| Transactietype | Transaction type (e.g. Verkoop = sale, Kasgeld in = cash deposit, Betaalwijze = payment method registration) |
| Filiaal | Store / branch code |
| Kassa-terminal | POS terminal / register the transaction was rung up on |
| Persoon | Employee / cashier number |
| Datum / Tijd | Date and time of the transaction |
| Klantnr. | Customer number, if the transaction is linked to a known customer |
| Nettobedrag / Brutobedrag | Net / gross amount |
Selecting a row populates the panels on the right with linked detail postings for that transaction — card postings, cancelled lines, stock postings, discounts & benefits (mix & match, coupons, loyalty points), and cash declaration entries.
Filtering
Use the filter field above the list (e.g. on Klantnr. or Datum) to narrow down to a specific customer or period instead of scrolling through the full journal.
Finding contacts — Contacten
Customer / contact master data lives in the Contacten (Contacts) list.
1. Navigate to Contacten
In Navision, drill down through the Afdelingen navigation tree on the left, following this path:
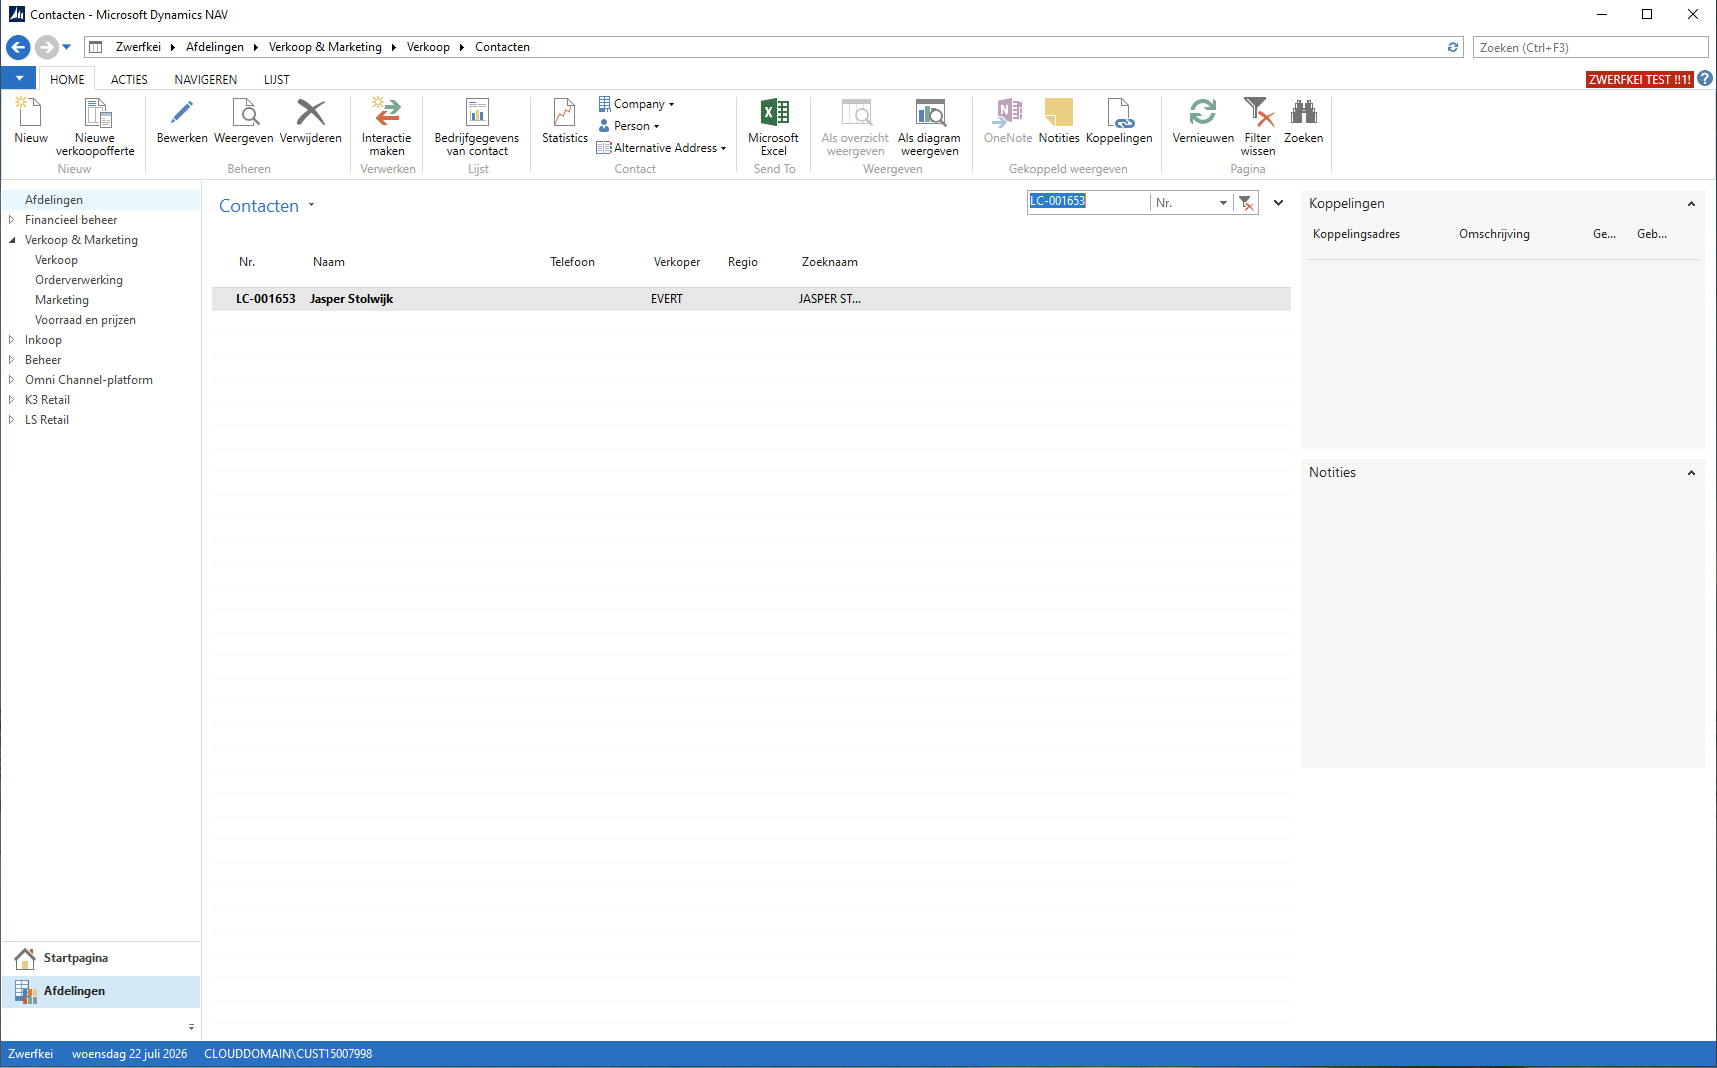
Zwerfkei › Afdelingen › Verkoop & Marketing › Verkoop › Contacten
As with the other lists, this path is also shown as a breadcrumb in the address bar once you're on the page.
2. Reading the list
The Contacten list shows one row per contact (company or person), with the most relevant columns:
| Column | Description |
|---|---|
| Nr. | Contact number |
| Naam | Name |
| Telefoon | Phone number |
| Verkoper | Assigned salesperson |
| Regio | Region |
| Zoeknaam | Search name |
Selecting a row populates the panels on the right — Koppelingen (linked records) and Notities (notes) — giving a quick view of related links and notes for that contact.
Company vs. person
Use Company / Person in the ribbon to filter the list down to just organisations or just individuals.